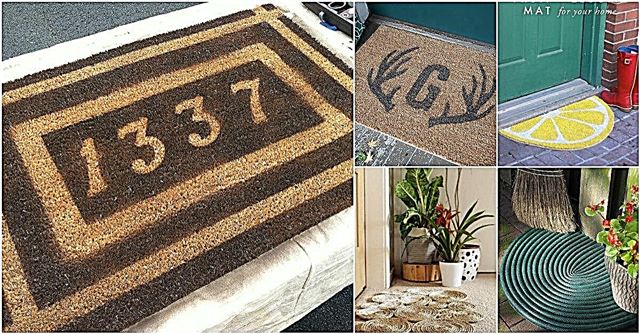
Burlap הוא חומר פופולרי מאוד וזה נותן לך אפשרויות מלאכה רבות. אם אתם מחפשים להוסיף מעט כפרי לביתכם או שאתם פשוט אוהבים את המראה של יוטה, יש כל כך הרבה דברים שתוכלו להכין!
 אספנו רשימה של 100 פרויקטים פשוטים של DIY, שתוכלו להכין באמצעות יוטה. מחצאיות וילונות למיטה ועד כריות, מסגרות לתמונות ואפילו לבוש לחתונה, תוכלו להרכיב בקלות את מלאכות השיוט הללו ולקשט את ביתכם או למסור אותן במתנות.
Burlap קל למצוא וזול יחסית (חשוב שקיות תפוחי אדמה) או שאתה יכול לרכוש אותו מחנות היצירה המקומית שלך והוא מגיע במגוון רחב של צבעים גם בימינו, כך שגם אם אתה בדרך כלל לא אוהב את הצבע החום, אתה יכול למצוא צבעים אחרים להשלמת עבודות היד שלך. תפוס את השיוט הזה והתחל באחד מהפרויקטים המדהימים האלה.
כרית יוטה של פרחים
הכרית הקטנה הזו היא הדרך המושלמת להוסיף קצת קסם כפרי לסלון או לחדר השינה שלכם. בין אם יש לכם אותו על הספה ובין אם תשתמשו בו ככרית מיטה דקורטיבית, הוא נחמד וממש פשוט להכנה. פרח הלבד הוא החלק המסובך ביותר אך גם זה קל יחסית. אתה רק צריך מספיק יוטה כדי ליצור את הכרית ואז כמובן את המלית. זה כל כך קל שאולי תרצה להכין כמה לרצפת הספה שלך ותוכל לשנות את הגודל כך שיתאים לצרכים הספציפיים שלך.
הוראות DIY - Bet1975
בד בד
זהו פרויקט נהדר שמושלם לשמירת תמונות או אפילו הערות. אתה יכול לתלות אותו במטבח ולהשתמש בכביכות הכביסה כדי לרשום הערות לגבי לוחות זמנים או אירועים חשובים. עליך לרכוש בד, שכנראה תוכל להשיג בחנות הדולר המקומית שלך ותצטרך סרט או קישוטים בד אחר כדי להחזיק את אטבי הכביסה המכילים את התמונות שלך או כרטיסי ההערה. אתה יכול למעשה להרכיב את כל העניין הזה בפחות משעה וזה נהדר להחזיק מתכונים או סתם כל דבר שאתה רוצה לשים עליו.
הוראות DIY - Akadesign
ביוט ביוט עם רוז עלוב
אתה פשוט לא יכול לקבל יותר מדי שקיות שקיות וזו עשויה לגמרי יוטה, עד לשושנה העלובה והמקסימה בצד. אתה יכול למעשה לשים את הוורד בכל מקום שתרצה אבל זה נראה נהדר ממש ליד הרצועה. שים לב שתצטרך בד כדי לכסות את החלק הפנימי אלא אם כן אתה באמת רוצה את זה לגמרי מהשיוטה. יש גם קצת תפירה נדרשת אבל גם לביוב מתחיל, מדובר בפרויקט מצוין וקטן שלא ייקח יותר מדי מזמנכם וייתן לכם תיק יפה שתוכלו להשתמש בו בחוף הקיץ.
הוראות DIY - Lamaisonreid
ראנר לשולחן יוטה ותחרה
איזו דרך יפה להלביש שולחן נפילה! רץ לשולחן תחרה ושטיפה קל להכנה כמו שהוא יפהפה. אתה יכול להשתמש בו בעונות אחרות, אך הוא יהיה מושלם לארוחות הסתיו ואפילו לחג ההודיה. זה גם פרויקט כל כך פשוט. אתה רק צריך לחתוך את יוטה שלך ואז להוסיף את התחרה. תוכלו להרחיב אותו על ידי הוספת תחרה רחבה יותר או פשוט להוסיף גבול תחרה דק כדי להקטין אותו. אתה יכול גם להחליף את האורך כך שיתאים לאורך השולחן הספציפי שלך וזה יהיה נהדר אפילו לשולחנות קפה או שידות.
הוראות DIY - חגיגות
אגרטל יוטה כפרי
האגרטל היפה הזה מיוצר למעשה עם קופסת פח ממוחזרת. אתה פשוט מנקה את הפחית ביסודיות ואז מדביק את היוטה מסביב. יהיה עליכם לחתוך את היוטה בכדי להבטיח שהיא תתאים בצורה מושלמת לאורך ואז להשלים אותה עם סאטן או סרט תחרה מקסים. אתה יכול גם לסרוג טופר ולהעביר את הסרט דרך זה. אלה יהיו נהדרים עבור חתונות להחזיק פרחים על השולחן, או שאתה יכול רק כמה מהם יושבים סביב הקיץ ומחזיקים פרחי בר מקסימים. מעט דבק חם יחזיק את השוטים והסרטים בצורה מושלמת במקום.
זמין ב: אגרטלים כפריים של אטסי בורפל
וילונות יוטה
תארו לעצמכם את המראה הכפרי שיהיה לביתכם כשאתם יוצרים וילונות יוטה יפים לתלייה. בין אם אתם רוצים משהו בחדר השינה, בסלון או אפילו בחדר האוכל, תוכלו להכין אותם די מהר ואין צורך בתפירה. הם עולים רק כ -7 דולר לפנל שהוא הרבה יותר זול מווילונות שקנו בחנות ואלה הרבה יותר ייחודיים. אם תרצה, תוכל לייפות אותם מעט בדברים שונים או שהם נראים נהדר בלי להוסיף שום דבר.
הוראות DIY - Fourgenerationsoneroof
לוח גיר הזזה כפרי עם גיבוי יוטה
זהו נוקאפור נהדר מחרס, שיהיה מושלם לשמירת מסרים משפחתיים. יש לו לוח כתיבת הודעות, כמו גם יוטה להצמדת פתקים, מתכונים או כל דבר אחר שאתה צריך כדי לשמור עליהם. היצירה המקורית של קדרות אסם (שכבר אינה זמינה) הייתה מעל 100 $, אך אתה יכול להכין זאת בעצמך בסביבות 10 $, תלוי מה יש לך ביד לפרויקט.
הוראות DIY - Prettyhandygirl
גרבי חג המולד של יוטה
אנו מבינים שזה מעט מוקדם לפרויקטים של חג המולד, אבל זה כל כך חמוד שרק היה צריך להזכיר אותו. אם אתה רוצה לקשט במראה כפרי בחג הקרוב, גרבי השינה האלה הם מושלמים לחלוטין. רק למדוד, לחתוך, לתפור ואז לייפות בכל מה שתרצו. הסלסולים הלא משולטים על אלה מקסימים וממש נותנים להם את המראה הכפרי הכפרי הזה. אתה יכול לעשות כמה שיותר מאלה שאתה צריך עבור המעטפת שלך או לדמיין להוסיף אותם לקישוטי המרפסת שלך.
הוראות DIY - Dearlillieblog
חצאית מיטה פרועה
חצאית המיטה הנהדרת הזו כוללת המון סלסולים והיא מושלמת ביוטה לאלה מכם המעוניינים להוסיף תחושה כפרית אמיתית לבתיכם. החצאית למעשה הרבה יותר קלה להכנה ממה שהיא נראית ותוכלו ליצור אחת בגודל קינג או קווין על פי ההוראות. אתה יכול כנראה גם לקצץ אותו אם אתה זקוק לחצאית מיטה בגודל מלא או תאום. הקשתות הקטנות בפינות ממש חמודות ותארו לעצמכם איך זה ייראה עם כמה כריות קישוטים של יוטה על המיטה.
זמין ב: חצאית מיטה פרועה של אטסי
תפריט ארוחת ערב מחיק
תפריט זה בהחלט הולך להלביש את המטבח שלך והוא משרת פונקציה קטנה כל כך שימושית. תוכלו לעקוב אחר כל הארוחות שאתם מתכננים להכין במשך השבוע. זה מאפשר לך לדעת שיש לך את כל מה שאתה צריך בהישג יד ושומר על כל הארוחות שלך בצורה מסודרת. הפרויקט עצמו הוא ממש קל ותוכלו להשתמש בכל ערכות הצבעים הרצויות לכם, כך שתוכלו להתאים אותו בצורה מושלמת לעיצוב המטבח שלכם. אלה היו גם מתנות נפלאות.
הוראות DIY - Bystephanielynn
אסם חרס בהשראת כרית צרפתית
כרית מונוגרמה מדהימה זו מושלמת לכל חדר שינה ומגיעה עם זר פרחי יוטה מקסים. אם כבר יש לכם את השיוט והמילוי, זה לא יעלה לכם כלום, וזה הרבה יותר זול מגרסאות קדרות אסם שיכולות לרוץ כמעט 50 דולר עם המונוגרמה. אתה יכול לעשות את זה גם בגרסה קטנה יותר כדי להלביש את המיטה או אפילו ספה אם אתה רוצה והם לוקחים מעט מאוד זמן להשלים.
הוראות DIY - וידויים של פסק דין
וילון מקלחת יוטה
ניתן ליצור גם וילון מקלחת יוטה וגם קולבים מקסימים להתאמה והכל ללא תפר תפירה נדרש. הפרויקט הקטן הזה משתמש בדבק בד וברזל כדי לשמור על הכל במקום. אטבי הכביסה בין ווי הווילון הם נגיעה נחמדה וגורמים לכל חדר האמבטיה להראות ממש כפרי ומיושן. זה מראה נהדר לכל חדר אמבטיה ואתם זקוקים רק לכ -5 מטרים של יוטה כדי להשלים את כל העניין, כך שזה ממש קל ובאמת לא יקר, במיוחד אם יש לכם כבר כמה מטרים של יוטה בהישג יד.
הוראות DIY - Halfbakedhomemaking
אנתרופולוגיה בהשראת פנס ההוריקן
אתה יכול להכין את פנס ההוריקן הנהדר הזה של אנתרופולוגיה עם מעט יוטה, חוט גינה וחבל יוטה ועוד כמה ציוד. תזדקק למיכל כדי ליצור את הטופס, אך תוכל למחזר גלון תה קר ישן, כך שאם יש לך את המצרכים האחרים בהישג יד, זה לא יעלה סנט. אלה נהדרים לקישוט בחוץ והם ממש קלים להכנה. אתה יכול לעשות כמה מהם ולבדר באמת על הסיפון בסטייל בקיץ הקרוב.
הוראות DIY - פזמונים
זר יוטה
אתה יכול ליצור את זר היוטה המקסים הזה ולהכין קישוטים שונים עבורו, כך שתוכל להשאיר אותו תלוי כל השנה ופשוט לשנות אותו קצת כדי להתאים לכל עונה. לזר עצמו לוקח מעט מאוד זמן ליצור ואתה זקוק למעט מאוד אספקה. אתה פשוט מורח את חומר היוטה על צורת הזר שלך, או שאתה יכול להכין אותו מחוט אם אתה מעדיף ואז להוסיף את העיטורים שאתה רוצה. זה לוקח כמה מטרים של יוטה, תלוי כמה אתה רוצה את הזר וניתן להוסיף כיתוב עץ או קישוטים אחרים באמצעות חוט פרחוני.
הוראות DIY - Theturquoisehome
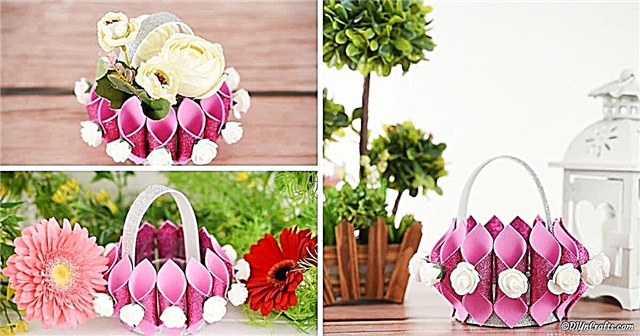
מטעי בד יוטה
אדניות קטנות אלה קלות להכנה והדרך המושלמת להציג את פרחי האביב המקסימים שלך. אחרי ששתלתם את הפרחים שלכם בתוחם סיבי הקוקו, אתם פשוט "עוטפים" את הכל ביוטה ומוסיפים סרט או קשת. אתה יכול להושיב אותם ישירות על הקרקע או להחזיק אותם במרפסת אם אתה רוצה שמשהו ילביש את פנייתך. קל לעשות אותם ונראים יפים כשיש לך כמה מהם מקובצים יחד.
הוראות DIY - Themotherhuddle
No-Sew Burlap Valance
הערך הגדול הזה נראה ממש יקר וממש אלגנטי, אבל אתה יכול להכין אותו תוך כשעה וזה עולה מעט מאוד ליצור. אתה בעצם רק צריך למדוד את החלון, לחתוך את היוטה ואז לתלות אותו על החלון. אתה יכול להשתמש בציפורני אצבעות כדי לאבטח את מקומן והשיוט יסתיר בצורה מושלמת את הזעזועים כך שלא יראו אותם. הקצוות המרופדים נראים נהדר בתחתית ואתה רק צריך להציב עניבות כלשהן בכל מקום שתרצה שיעלו את השווי הרצוי.
הוראות DIY - 11 מגנוליאל
לוח מודעות יוטה
לוח המודעות הגדול של יוטה זה קל מאוד וזול באמת ליצירה. אתה רק צריך לוח שעם, אותו תוכל לאסוף בחנות הדולר המקומית שלך עבור מעט מאוד, אקדח סיכות, כמה נעלי ריפוד וחצר של יוטה. אתה פשוט מכסה לוח שעם רגיל עם יוטה ואז משתמש בנעלי הריפוד כדי לתת לו מעט קישוט. זה נהדר עבור מטבחים ולוקח מעט מאוד זמן להרכיב אותם. שמור כאן על המתכונים, השטרות או כל מה שאתה רוצה והזכר לעצמך משימות חשובות בסגנון.
הוראות DIY - Tidymom
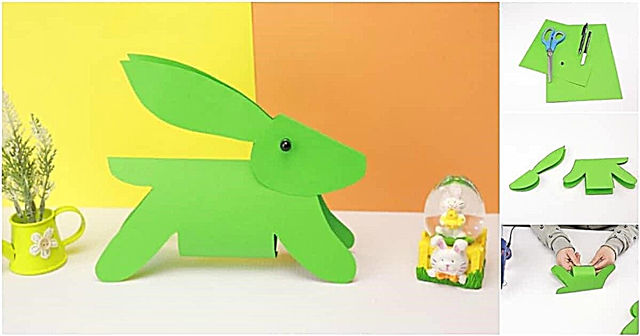
ארנבות יוטה לבנות
בין אם אתם מחפשים פרויקט ייחודי באמת לחג הפסחא ובין אם אתם פשוט מעריצים ארנבות, אתם בטוחים שתאהבו את פרויקט הארנבות הקלה הזה. שים לב שאתה לא באמת צריך לעשות את זה בלבן. אם אתה מעדיף יוטה טבעי (או כל צבע אחר לצורך העניין) אתה יכול להשתמש בכל הצבע שאתה מעדיף. אתה רק צריך לחתוך את צורת הארנבת מהשיוטה, לתפור אותה ביד ולזכור למלא לפני שאתה סוגר אותה. אלה יהיו נהדרים עבור סלי חג הפסחא תוצרת בית או פשוט לכל מקום שתרצו קישוט גחמני וחמוד באמת.
הוראות DIY - Cottageatthecrossoutions
אהיל פרוע בהשראת אנתרופולוגיה
אתה זקוק רק לחצר וחצי של יוטה כדי ליצור את האהיל הפרוע היפהפה הזה, שייראה מושלם בכל חדר בביתך. אתה יכול להשתמש בבסיס מנורה ישן שכבר יש לך או לאסוף אחד תמורת כסף או שניים בחנות הבישול המקומית שלך או במכירת חצר. אז פשוט צבע את הבסיס באיזה צבע שתרצה ותתחיל לעבוד על הגוון שלך בהשראת האנתרופולוגיה. אתה אפילו לא צריך לתפור את זה. אתה יכול להשתמש בדבק בד כדי לשמור על הקפלים ביחד, מה שהופך אותו ליצירתי קל כמו שהוא יפה.
הוראות DIY - Tatertotsandjello
דלעת ביוטה
אל תחכה עד הסתיו כדי להתחיל ליצור את הדלעות הקטנות והמקסימות האלה, שאתה יכול לעשות בעומס בגדלים שונים. אלה נהדרים לקישוט בסתיו מבפנים או מבחוץ. יש מעורב בתפירה כדי להכין אותם, אבל הם הרבה יותר קלים ממה שהם נראים ואתה יכול לעשות אותם בצבעים שונים אם אתה רוצה ליצור תצוגה צבעונית ונועזת באמת. אתה יכול אפילו לקשט את השטיפה מעט עם שארפיות או סמנים אחרים לפני שאתה מכין אותם לדלעות כדי ליצור תצוגה ייחודית באמת.
הוראות DIY - רענן-חידוש
מחזיקי כלי ביוטה
מחזיקי הכלים הקטנים האלה הם הדברים המושלמים להלביש את שולחן ארוחת ההודיה שלך. כמובן, אם אתה לא רוצה לחכות לחג ההודיה כדי להשתמש בהם, הם נהדרים גם למפגשים בקיץ. הם פשוטים מאוד להכנה ואינך צריך לתפור כלום. אתה יכול לשים אותם יחד עם אקדח דבק חם ואז פשוט להוסיף את הקישוטים או תגי השם או כל דבר אחר שתרצה לקשט אותם. פיסת חוט קטנה מושלמת להוספת שמות או כל הודעה מיוחדת שתרצו לחלוק עם אורחי ארוחת הערב שלכם.
הוראות DIY - Iheartnaptime
אגרטל עטוף ביוטה
רק רצועת יוטה, אגרטל זכוכית רגיל ומעט תחרה יעזרו לכם ליצור אגרטלים יפים עטופי יוטה שמתאימים לחתונות או לכל מקום בבית. אתה יכול בקלות לשבלן תמונות או מילים על האגרטלים בעזרת צבע לבן ואז להשתמש בתחרה לבנה כדי לקשור אותם יחד. אתה יכול לכסות כל אגרטל ואפילו למחזר בקבוקי יין או כמעט כל דבר אחר שתרצה להפוך לאגרטל בעזרת הפרויקט הזה. זה מהיר וקל ועולה מעט מאוד - כלום אם יש לך קצת יוטה וציוד אחר בהישג יד.
הוראות DIY - להיות מוקסם
דגל יוטה DIY
דגל זה הוא פרויקט נהדר אם אתה רוצה משהו קצת ייחודי שתלוי בבית שלך או שאתה יכול להשתמש בו גם כדגל חיצוני. אתה רק צריך לחתוך את יוטה לגודל שאתה צריך, להוסיף כל הודעה או תמונה שאתה רוצה עם סטנסילים ואז להוסיף קצת חבל יוטה לתליית הדגל. הפרויקט כולו ייקח פחות משעה (תלוי כמובן באיזה מסר אתה רוצה להשתמש ואיך אתה מיישם את המילים) ולא יעלה שום דבר אם יש לך חתיכת יוטה וצבע כלשהו בהישג יד.
הוראות DIY - Thewoodgraincottage
עטיפות קאפקייקס ביוטה
עוגות מרופדות ביוטה הן רעיון נהדר לחתונות או סתם בכל עת שתרצו להוסיף לקאפקייקס הטעימים שלכם משהו מיוחד. אם אתם מתכננים חתונה בנושא יוטה, אלה ייראו נהדר ליד עוגת החתונה שלכם. אתה רק צריך להדביק את היוטה על תבנית עטיפת קאפקייקס ואז להושיב את הקאפקייקס לתוכם. אתה יכול להוסיף כל סוג של קישוט שאתה רוצה, אם כי עניבת יוטה או חוט פשוטים נראים נהדר דרך האמצע.
פמוטים עם יוטה
פמוטים קטנים אלה יהיו מושלמים לקישוט בסתיו אך הם ייראו נהדר גם בעונות אחרות. אתה רק צריך לחתוך יוטה כדי לכסות פמוטים מזכוכית (או כל מיכל זכוכית לצורך העניין) ואז לקשט אותם איך שאתה רוצה. בלוטים נראים נהדר במרכז הקדמי, אבל אתה יכול להשתמש בדמיון שלך לקישוטים. אתה פשוט עוטף את השטיפה סביב הצנצנת, מדביק אותה למקומה ואז מוסיף סרט חוט מלפנים כדי שייראה ממש נהדר.
הוראות DIY - Victoriabrikho
תחתיות יוטה
תחתיות יוטה נהדרות לפנים או בחוץ. אתה יכול להשתמש בהן כדי להלביש את מסיבות ארוחת הערב בחוץ או לשמור אותן בפנים כדי למנוע נוזלים לעלות על משטחי עץ. החלק הגדול הוא שהם ממש קלים להכנה. אם יש לך רק מעט בד יוטה בהישג יד, אלה לא באמת יעלו לך כלום. תזדקק לריבועים מחומר כלשהו כדי ליצור את הבסיס לתחתיות התחתיות ואז פשוט הוסף את היוטה וקשט אותם איך שתרצה. ציור עובד טוב ותוכלו לצייר ישירות על יוטה.
הוראות DIY - אליסאנדקרלה
תצוגת עגיל
תצוגת העגיל הנהדרת הזו עשויה מיוטיפה ומוגדרת במסגרת תמונה. זה ממש קל להכנה ותוכלו להרים מסגרות לתמונות בסביבות הדולר כל אחד כך שזה גם מאוד לא יקר. אתה רק צריך להדביק את היוטה למזרן המסגרת ואז לצבוע את המסגרת באיזה צבע שתרצה. עגילים שיש בהם סגירת וו דייגים יחליקו ישר לתוך יוטה ותוכלו להכניס גם סוגים אחרים של עגילים לכאן. קח קצת זמן להתאמה אישית של זה קצת וזה יהווה מתנה נפלאה למי שיש לו יותר עגילים ממה שהם יודעים מה לעשות איתם.
הוראות DIY - Cucicucicoo
כסא מטבח מכוסה יוטה
תן לכיסא מטבח ישן מהפך נהדר על ידי כיסוי ביוטה. גם אם אין לכם ניסיון רב בריפוד מחדש, מדובר בפרויקט די קל. אתה רק צריך לחתוך את יוטה ואז לחבר אותו לאזור הישיבה, לכסות את הבד הישן או שתוכל להסיר תחילה את החלק הישן. אם יש צורך, אתה יכול גם להוסיף מעט יותר ריפוד כדי להפוך את הכיסא לנוח הרבה יותר. זה פרויקט סוף שבוע נהדר, במיוחד אם אתה רוצה לשחזר את כל כיסאות המטבח שלך בשטיפה. לכיסא אחד בלבד, זה לא אמור לקחת יותר משעתיים.
הוראות DIY - Boyohboyohboycrafts
לוח שעם בכיס בכיס
בין אם יש לך לוח שעם ישן שתרצה לכסות ובין אם תרצה לאסוף אחד בחנות הדולר שלך (הם בערך דולר כל אחד), זה פרויקט נהדר שנותן דחיפה קטנה ללוח תזכירים רגיל. היוטה מקופלת באזורים מסוימים כך שהיא תחזיק בצורה מושלמת תמונות או אותיות, כל מה שאתה צריך להכניס לשם. אתה יכול להשתמש בצידי אצבע כדי להחזיק דברים גם כן, כך שזה באמת עובד כדי לעזור לך להתארגן והכיסים הקטנים מאוד נוחים לאלו שנמצאים בדרכים.
הוראות DIY - Uncommondesignsonline
אין לתקן שקיות ביוטה
שקיות נהדרות להוספה למגירות השידה ולשמירה על הריח הנפלא של הבגדים. שקיקי יוטה קטנים אלה מלאים בלבנדר טרי ואינם דורשים שום תפירה. הם מעולים למגירות או ארונות, או שאתה יכול להמציא אותם ולתת אותם במתנה. אתה פשוט מכין כיס מהשיוטה, מוסיף לבנדר ואז דבק או קושר אותו יחד. אתה יכול לקשט אותם קצת אם אתה רוצה או פשוט להשאיר קצת לבנדר מבחוץ.
הוראות DIY - מקום מקומי
מפת שולחן יוטה פרועה
המפה היפהפייה הזו אורכת כ -12 מטרים של יוטה, כמו גם כמה מטרים של בד מוסלין לתחתית. יש בו סלסולים מקסימים המושלמים לארוחות ערב רומנטיות או שייראו נפלא על שולחן האוכל שלך כל הזמן. אתה יכול להוסיף תחרה או חומר דקורטיבי אחר גם אם תרצה אבל זה נראה ממש טוב בדיוק כמו שהוא. תצטרך לתפור קצת אבל כמה נפלא זה ייראה על שולחן האוכל שלך בחוץ? או שתוכל להשתמש בו גם לחגים.
הוראות DIY - חוגגים את חיי היומיום
שקית ארנבת יוטה
תיק תיק קטן וחמוד עם ארנבת סגולה (או שתוכלו לעשות כל צבע שרציתם) ייראה נהדר בחג הפסחא. אתה יכול להשתמש בזה לציד ביצי חג הפסחא או לשאת אותו כארנק אם אתה רוצה. זה תיק קל יחסית להכנה ואתה יכול אפילו להוסיף זנב כותנה קטן וחמוד לארנב שלך כדי שיהיה ממש מקסים. פרויקט זה דורש שקית יוטה שכבר מיוצרת, אך אתה יכול בקלות להכין בעצמך ואפילו לעשות את זה בצבעים שונים של יוטה כדי לתת במתנה.
הוראות DIY - Thecasualcraftlete
באנר ביוטה
מקשטים את הסתיו הזה (או באביב, בקיץ או בחורף) עם כרזה יוטה מקסימה שתוכלו להכין לעצמכם בקלות. אתה רק צריך לחתוך את החלקים לבאנר, לשבלט בכל מה שאתה רוצה להגיד ואז להדביק יוטה או חוט לכל חתיכה כדי להחזיק אותם יחד ולתלות אותם. זה יהיה ממש נחמד ככרזה לחג המולד או חג ההודיה, או שאתה יכול להפוך אותו בקלות לדגל חג הפסחא עם ארנבות או כל דבר אחר שתרצה להוסיף.
הוראות DIY - Iheartnaptime
שטיח יוטה חיצוני קל
הכינו שטיח חיצוני נחמד באמת לקראת הבידור שלכם בקיץ עם רק כמה יוטות, צבעים אקריליים, שבלונות וכמה אבק אקרילי. האבק מונע מקצוות היוטה להתפרק ועוזר לתת גוף לשטיח. אתה יכול לעשות כל עיצוב שתרצה ותוכל להרים יוטה בצבעים שונים אם הטבעי לא ממש מתאים לעיצוב החיצוני שלך. זהו שטיח יפהפה ולוקח מעט מאוד זמן להכין. הוסף אותו לסיפון או לפטיו שלך ובאמת תחיה את קישוט החוץ שלך.
הוראות DIY - טיפול דירות
וילונות שקית קפה יוטה
אתה יכול למצוא שקיות קפה ישנות המיוצרות מ- burlap בקלות באינטרנט וברגע שיש לך זוג ביד, אתה יכול להכין את שקיות הקפה המקסימות האלה למטבח. תמצית הפרויקט היא ממש קלה. אתה רק צריך למדוד את החלונות שלך כדי להבטיח שיש לך את יוטה בגודל הנכון ואז ליצור את הקולבים כדי למיתר את השערה על מוט הווילון. אתה אפילו לא צריך לתפור. אתה יכול להשתמש בדבק בד אם אתה מעדיף ואת הטבעות ניתן לחבר עם קליפסים.
הוראות DIY - Debbie-debbiedoos
יוטה כפרי עות'מאני
אם יש לך עות'מאנית ישנה שאתה צריך לרפד אותה מחדש, מדוע שלא תעשה זאת בשטיפה? זה מראה נהדר שתואם למעשה לכל עיצוב סלון והוא למעשה הרבה יותר קל לעשות ממה שאתה חושב. אתה רק צריך להסיר את הבד מהעות'מאני ואז להחליף אותו בכיס מספיק יוטה כדי לכסות אותו ויש לך קצת תוספת כדי להדביק את הצדדים. אם אין לך עות'מאן ישן, אתה כנראה יכול להשיג אחד די זול במכירת חצר או בחנות יד שניה המקומית שלך.
הוראות DIY - Lizmarieblog 
שלט כביסה ביוטה
שלט יוטה זה ייראה נהדר בחדר הכביסה וכל כך קל להכין שתוכלו לסיים אותו בפחות מיממה. תזדקק למסגרת כדי לתלות אותה ותצטרך גם להדפיס את הכביסה הקטנה והחמודה שאומרת ישירות על יוטה שלך. תאמינו או לא, הדפסה על יוטה היא ממש קלה ותוכלו לעשות זאת עם מדפסת רגילה. ברגע שתלמד את הטריק הקטן והשימושי הזה תרצה להדפיס כל מיני דברים על יוטה. לאחר שסיימתם את ההדפסה, פשוט מסגרו את האמרה ותלו אותה בחדר הכביסה שלכם.
הוראות DIY - מדברים מקומית
עצי סרט יוטה
בין אם אתם מקשטים לחג המולד ובין אם אתם רק רוצים שמשהו ייחודי באמת יעטר שולחן קפה, עצי הסרט היוטים הללו הם מושלמים והם קלים לחלוטין להכנה. אתה יכול להשתמש בחרוט קצף או להכין חרוט מלוח הפוסטר ואז פשוט לעטוף סביבו את יוטת הסרט. אתה יכול לעשות את זה בצבעים שונים באביב ובקיץ או לשמור עם ירוקים ואדומים קלאסיים לחגים, מה שאתה רוצה. סרט יוטה קווית עובד טוב מאוד ומחזיק במקום יפה. בנוסף, אתה יכול להשיג את זה בטונות של צבעים שונים.
הוראות DIY - Thegirlcreative
מלאך חג המולד של יוטה יפהפה
זה הזמן להתחיל להכין קישוטים ייחודיים אלה לחג המולד ומלאך יוטה זה הוא חובה אם אתם אוהבים את המראה הכפרי. אלה היו גם מתנות נפלאות והם באמת קלים לעשות. סרט יוטה קווי משמש לכנפיים ויש עוד כמה ציוד שתזדקק לו. הם ממש לא יקרים להכנה ותוכלו לקשט אותם בכל מספר דרכים, כך שתוכלו ליצור סגנונות שונים הייחודיים לחלוטין.
הוראות DIY - Uncommondesignsonline
טבעות מפיות חרוזים עם חרוזים
טבעות המפיות האלה ממש אלגנטיות ומושלמות לארוחות ערב רומנטיות, לחתונות או סתם מתי שרוצים משהו מיוחד במיוחד. ישנן למעשה כמה דרכים שונות בהן ניתן להכין טבעות מפיות עם יוטה וכולן קלות יחסית. אם אתה אוהב את מראה החרוזים, אתה יכול פשוט לחתוך את היוטה, להוסיף את החרוזים ואז לתפור את הקצוות יחד כדי ליצור את הטבעת. תפירה כנראה תעבוד טוב יותר מדבק בד עבור זה, אך תוכלו לתפור אותו ביד כך שאין צורך במכונה.
הוראות DIY - Fabyoubliss
קישוטי יוטה כפרית
ילדים יאהבו לעזור לכם ליצור קישוטי חג המולד המקסימים האלה עם יוטה. דמיין את עץ חג המולד שלך מעוטר לחלוטין ביצירות המקסימות האלה. הם קלים להכנה ותוכלו להשיג כמה מהם מכמה מטרים של חומר יוטה. השתמש בנצנצים, סטנסילים וקישוטים אחרים כדי לקשט אותם מעט או פשוט תוכל להשאיר אותם פשוטים, מה שאתה מעדיף. הם לא דורשים תפירה - במקום זאת משתמשים בדבק בד ואז פשוט מדביקים סרט, חוט או כל חוט אחר שיחזיק אותם על העץ.
הוראות DIY - Ttrinketsinbloom
טופיארי יוטה
תוכלו ליצור טופיאריות יוטה מקסימות בכל הגדלים השונים, כך שהן מושלמות לבית ולחוץ. הכינו כמה כאלה גדולים למדי לקום מחוץ לדלת הכניסה שלכם, או שתוכלו ליצור קטנים יותר כדי ליצור תצוגה מרכזית יפה או תצוגת שולחן. תוכלו להוסיף אותם לאדנית צבעונית באמת לשימוש באביב או לשים אותם בלבן לקישוט במהלך הסתיו והחורף. אלה נהדרים. הם קלים להכנה ותוכלו לעשות כל כך הרבה עם טופיאריה מקסימה מבחינת קישוט.
הוראות DIY - עיצוב וחתונות
פתחי יוטה בשבלונה
באמת ערכו את שולחנכם יפה בעזרת הפלייסמים הקלים הללו. אתה פשוט חותך את היוטה שאתה צריך לגודל המתאים, מוסיף קצת דבק בד לקצוות ומגהץ - זה מונע מהם להתפורר ואז שבלונה בכל מה שאתה רוצה. תוכלו ליצור אחד עם כל אחד מבני המשפחה לארוחות משפחתיות או להעביר מסרים מיוחדים לחגים. אלה נהדרים מכיוון שהם לוקחים מעט מאוד זמן ומעט מאוד בד, כך שתוכל להפיק כמה מכמה מטרים של יוטה. וגם אין צורך בתפירה ולכן קל מאוד להכין אותם.
הוראות DIY - ביתי
סלסלות קיר תלוי על קיר
עדיין יש לך המון זמן ליצור את קיר סלסלות הפסחא המקסים התלוי מתוך יוטה. אתה יכול להשתמש בסרט יוטה קווי, שהרבה יותר קל לכופף ולהתפתל ונדבק ביחד די טוב בעת יצירת מלאכות מסוימות. ברגע שמכינים את הסלסילה, פשוט מקשטים בגוזל ממולא, באני או כל דבר אחר שרוצים להוסיף. זה פרויקט כל כך מקסים וכל כך קל שפשוט לא תאמינו. השתמש בזה כדי לקשט את הדלת ותוכל לדלג על קישוטי הפסחא ופשוט להשתמש בצבעי אביב אם אתה רוצה להשאיר אותו תלוי כל הקיץ.
הוראות DIY - Trendytree
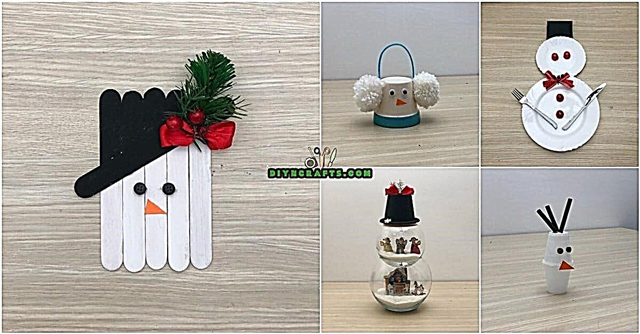
תליית קיר תליית קיר של ביוטה
בתוך כשעה לערך תוכלו ליצור קיר תלייה תלת מימדי זה שיהיה מושלם לקישוט חג המולד שלכם, או שתוכלו להכין כמה מהם כמתנות. אתה רק צריך להצמיד את יוטה למסגרות ואז לצייר את איש השלג. זה באמת לוקח מעט מאוד זמן ואם יש לך קצת יוטה ומספר פריימים קטנים, לא תצטרך לבזבז שום דבר על זה. אתה יכול לעשות אותם בתווים שונים אם תרצה, אז אם אתה לא באמת מוכן להתחיל במלאכת חג המולד, פשוט לעשות דמויות קיץ או אפילו ארנב פסחא.
הוראות DIY - כיצד זה
רץ לשולחן ביוטי סל
רץ השולחן הזה נראה ממש מסובך אבל זה פרויקט קל מאוד. יהיה עליך להיות מסוגל ליצור את אפקט אריגת הסל, שהוא הרבה יותר פשוט ממה שהוא נראה. כשתעבור, הקפד להדביק את כל החלקים כדי שיישארו במקום בצורה מושלמת. זהו רץ נהדר לשולחנות חדר אוכל או שתוכל להכין אותם בגדלים שונים לשולחנות קפה, שידות או פשוט לכל מקום שתרצה. הכינו גרסאות קטנות יותר ומרובעות להחלפת מפיות.
הוראות DIY - Taradennis
מסגרות לתמונות יוטה
מסגרות היוטה היפות האלה כל כך קלות להכנה ואינך זקוק לשום עץ כדי להכין אותן. אתה רק צריך לכסות קרטון עם יוטה כדי לקבל מסגרות מקסימות שנראות כאילו הן עולות הון תועפות. אלה יהוו מתנות נפלאות לכל מי שאתה מכיר והם כל כך קלים להכנה שאתה יכול לעשות כמה ביום. אתה גם לא צריך לעשות שום תפירה. אתה מחזיק את היוטה יחד עם דבק בד ואז פשוט מוסיף קישוטים שתרצה כדי להפוך אותם לייחודיים באמת.
הוראות DIY - מלאכות יד 
עטיפות נרות פטריוטיות
הרביעי ביולי מתקרב ועטיפות הנרות הללו יהיו מושלמות למסיבות וקישוטים בחוץ. בד יו-יו קטן מקשט את עטיפות הנרות שקל להכין מרצועות יוטה. פשוט בחרו את הגודל שאתם צריכים ואז גזרו והשתמשו בדבק בד כדי לשמור על העטיפה. ואז קשטו בבד יו-יוס או שתבחרו בכל צורת קישוט אחרת שתרצו. אתה יכול להשתמש בפמוטים מזכוכית מסורתית או להיות יצירתי באמת ולמחזר כמה בקבוקי זכוכית וצנצנות ישנות.
הוראות DIY - הכניסה לארץ
תלוי על קיר מכתב ממוסגר
מונוגרמות נהדרות לקישוט הבית שלך וזה נעשה בעץ ויוטה שהופך אותו באמת ייחודי ומדהים באמת. יהיה עליך לרכוש מכתב עץ (או לגזור אותו אם יש לך את הכלים הנכונים) ואז לצבוע אותו בכל צבע שתרצה. קבל מסגרת שתתאים או השתמש ישנה וצבע אותה גם כן. הגב הוא יוטה והמכתב מוגבה כך שיש לו אפקט תלת ממדי נהדר. זה ממש קל לעשות ויהווה מתנה לחתונה נפלאה אם אתה מכיר מישהו שמתחתן הקיץ.
הוראות DIY - Newideasforyou
קופסת בד יוטה
שמור על ציוד יצירה, תפירה או חומרי סריגה או כמעט כל דבר אחר שתרצה להיות מסודר עם קופסת בד יוטה נהדרת. לא רק הקופסאות הללו נראות נהדר, הן קלות מאוד להכנה. פרויקט זה דורש מעט תפירה, אך זה קל אפילו למתחילים. אתה רוצה לבחור בד עבור החלק הפנימי של הקופסה וזה לוקח רק כמה שעות (אולי אפילו לא כל כך הרבה זמן) ליצור. אלה נהדרים לארגון האמבטיה או לשימוש כמחזיקים במגזינים.
הוראות DIY - Ecokaren
מדף מגזינים בהשראת צרפת
אם אתה נוטה לזרוק מגזינים (בחדר האמבטיה, אולי), אז מתלה המגזינים הזה הוא חובה בהחלט. זה ממש קל להכנה וייקח לך פחות משעה מההתחלה ועד הסוף. היוטה מקופלת כך שאתה פשוט מגלגל את המגזינים מעלה ומחליק אותם ישר למקומם. אתה יכול לקשט את זה איך שאתה רוצה אבל זה נראה ממש טוב בעיצוב צרפתי. זה כל כך קל שאולי רק תרצה ליצור אחד לכל חדר אמבטיה בביתך או להשתמש בו במטבח כדי להחזיק את כל מגזיני הבישול שלך.
הוראות DIY - Thegraphicsfairy
חצאית עץ פרועה ללא תפירה
זה באמת אף פעם לא מוקדם מדי להתחיל בעבודות יד לעונת חג המולד. חצאית העץ הפרועה היפה הזו בעץ עשויה יוטה ואינה דורשת שום תפירה. זה אולי קצת לוקח זמן אבל רק דמיין לעצמך כמה העץ שלך ייראה מדהים עם החצאית הזו מתחתיו. אתה משתמש באקדח דבק חם כדי להחזיק את הכל ביחד וזה עובד בצורה מפתיעה גם עבור הקפלים. עכשיו, אתה יכול לקנות אותם באינטרנט תמורת קצת יותר מ- $ 100, אבל למה שתעשה זאת כשתוכל להרוויח אחד בסביבות 20 $ לערך?
הוראות DIY - Eevanad
זר צילומי יוטה
אם אתם מתכננים להכין זר יוטה, למה לא להתאים אותו באמת ולהוסיף תמונות משפחתיות? זה רעיון למתנה יפה אם אתם מחפשים משהו ייחודי באמת ליום האם או פשוט מכינים לעצמכם. התמונות קשורות בקשתות בצבעים מתואמים והמראה הכללי פשוט מדהים. You start with a wreath form and some wired burlap ribbon and from there, you can actually customize it just about any way you want to make it totally unique.
DIY Instructions – Thistlewoodfarms
Tufted Burlap Headboard
If you are looking to redo the bedroom, this burlap headboard is the perfect place to begin. Rustic and charming, you can actually make it in whatever size you need for your specific bed. It is really easy and the completed look is lovely. Add some burlap throw pillows and you can completely change how your bedroom looks in less than a day. It doesn’t take nearly as much material or as much time as you may think to create this look and you can embellish with burlap buttons or just anything you want.
DIY Instructions – Thestudiolo
No-Sew Burlap Bow Ties
Imagine your country wedding complete with burlap bow ties. These adorable little ties require absolutely no sewing and they are clip-ons so there are no worries of your guys being able to tie them when they are finished. These take so little time to make and very little fabric for each one so if you are planning a rustic wedding with burlap accessories, a couple of yards will go a long way in making all of the bow ties that you need.
DIY Instructions – Weddingwindow
Stamped Burlap Ornaments
Instead of using the same plain old ornaments this coming Christmas, why not spruce it up a bit by making these adorable stamped burlap ornaments? The project involves putting burlap around foam balls (which by the way are very inexpensive) and then stamping your message across them. You can display any message you want and these would also look great on wreaths or just in a bowl by the front door for added decoration.
DIY Instructions – Blissbloomblog
Stenciled Magnetic Board
Add a little style to those organization areas with an easy to make stenciled magnetic board. The stenciling makes it as elegant or whimsical as you want it to be so you could use it as an art piece which also doubles as a functional magnetic board. Just stencil in whatever pattern you want and if you want, you can add a few embellishments made from burlap like flowers, ribbons or bows. Tie a ribbon or use twine to give it a hanger.
DIY Instructions – Domestically-speaking
Burlap Project Bin
What better place to store all of those crafting supplies than in a great DIY burlap bin? This is a really easy project that won’t even take you a day to complete and once you are finished, you will have a wonderful place to store just about anything. A little burlap, some upholstery tacks and some small wooden bins (think the types that oranges come in) and you’re all set to create an attractive bin that could be used for any number of organization projects.
DIY Instructions – Gardenhouseliving
No-Sew Stenciled Burlap Pillows
Twine bows are used to hold this adorable burlap pillow together so there really is no sewing involved. It’s a great project if you have a couple of hours to spare and the time really depends on how complicated your stenciling is. If you just want a small picture or message, you can finish this up in less than an hour. The twine around the edges is a really nice touch and it gives it a great country feel and all with absolutely no sewing required.
DIY Instructions – Debbie-debbiedoos
Coffee Bag Purse
Forget paying hundreds of dollars for a Dior original. You can make this adorable coffee sack purse yourself for less than $10 – depending on the materials that you have on hand. You will need an old book for the supporting frame and then you just have to sew it all together. It’s actually a lot easier than it looks and you will end up with a bag that very strongly resembles Dior’s coffee bag purse only you’ll have a few hundred dollars left over. If you’re not a fan of the coffee bags, just use plain burlap and maybe a few stencils to get the design that you want.
DIY Instructions – Trinketsinbloom
Burlap Garland
To create a lovely burlap garland, you really don’t need anything except the wired burlap ribbon and some string for hanging. You will need something to weave the ribbon in and out of the burlap but you can use a safety pin or bobby pin for that. Then just bunch up the burlap to create a great poufy ruffled look and tie it up. You can use this for Christmas decorating or just have it on the mantel whenever you need a little extra something.
DIY Instructions – Southerndiydiary
Spring Banner Lampshade
A mason jar is the base for this adorable lamp that has a burlap covered lampshade. While you can buy a lampshade in burlap, it is a lot cheaper to just cover an old one yourself. The best part of this little lamp is the spring themed banner than runs along it. Colorful ribbons complete the look. You could also have spare banners in fall colors or in a Christmas theme so that you can change it around whenever the seasons change.
DIY Instructions – Redberrybarn
Burlap Purse with Shabby Rose Decoration
If you want a really easy sewing project and you are in the market for a new purse, this shabby rose purse is a great choice. The rose is made of burlap and in a contrasting color, it really stands out. You can complete this project in a weekend or even in a day if you are quite the seasoned sewer. It would make a wonderful gift for someone who likes things on the unique side or just make it for yourself. It has loads of room on the inside and is much easier to make than it looks.
DIY Instructions – Lamaisonreid
Barrel Shade Chandelier
While you may not be able to make this entire chandelier, you can certainly make the barrel shade that covers on it. The shade is completely covered in burlap which makes it both elegant and rustic at the same time. You may be surprised at how easy it is to create this look, which would be perfect in a foyer or formal dining room. The entire look will cost you less than $15 and take only about an hour or so to complete.
DIY Instructions – Burlapanddenim
Floral Burlap Clutch
This lovely clutch is both simple and inexpensive to make. You can do it in whatever colored burlap you have on hand or whatever you want and then create the flowers in contrasting colors to make them stand out. This is a great bag for evenings out and easy enough for teenagers to make just in case your daughter wants to create something special for prom. The shape and size of an envelope makes it perfect for times when you don’t have a lot to carry with you.
DIY Instructions – Anightowlblog
Patriotic Burlap Flag
Dress up your front door for the Fourth of July with this great patriotic burlap flag that you can make in less than an hour. You will need a bit of burlap and some blue fabric – denim works really well – as well as the cover of a hardback book to create the shape. You just create a flag with your material and then hang it with twine or another similar material. This is actually great for displaying all year and is so very easy to make, not to mention very inexpensive.
DIY Instructions – Somewhatquirkydesign
Vintage Inspired Feedbag Pillows
You don’t actually have to find vintage feedbags to have pillows that resemble them. You can easily make them yourself and dress up your bed in a great rustic way. You will need to paint the lines so that they resemble vintage feedbags and these work great with burlap. Then just sew the ends together, stuff with whatever you prefer in your pillows and seal it all up. You can also use stencils to create whimsical or vintage sayings on the pillows so that they really look authentic.
DIY Instructions – Retropolitanhip
Vintage Wire Basket
This rustic looking basket would make a wonderful hamper in your bathroom or bedroom or you could make a smaller version and use it for magazines or anything else you need. You just line the inside of the vintage wire basket with burlap and then add any decorations or adornments that you want. If you are using it for décor, just add a few burlap pillows to the top and you’re all set. You could also use it for a gift basket and fill with various other burlap type décor.
DIY Instructions – Gailsdecorativetouch
Burlap and Tin Can Vase Garland
A few up-cycled tin cans and some burlap will give you all you need to create this beautiful garland that you can actually plant flowers in. This would look great anywhere that you need to add a little color or greenery. You could use it in the kitchen for growing herbs or hang it on the porch with seasonal flowers in it. Make sure that you clean the tin cans really well and use a can opener that removes the complete top so that there are no sharp edges. Then just cover with burlap and hang with twine.
DIY Instructions – Foxhollowcottage
Burlap Flower Pot
These burlap flower pots are the perfect way to keep your plantings organized this spring. You can use them for flowers or even vegetables or herbs. You just cover a five gallon bucket with burlap, secure it and then label your pots however you want. Hang some twine around the bucket to hold the label in place and your plants will remain perfectly organized so you’ll always know which ones are which, even before they begin growing. This is a great idea for yards that don’t really have garden space.
DIY Instructions – Too-much-time
Burlap Fall Leaf Decorations
In just a few minutes, you can cut out multiple leaves from burlap to create gorgeous fall decorations. You merely have to trace the leaf shapes and then cut them out. If you love using mod podge, you can use that to hold your leaves onto real twigs or anything that you want to decorate for fall. String them all together and create a banner or just have multiple twigs in a glass vase and display your leaves in their natural habitat. This is a great little project that will help you along with other projects.
DIY Instructions – Foxhollowcottage
Burlap Tiki Torches
Save those empty wine bottles this spring and by summer you could have several gorgeous burlap tiki torches lighting up your outdoor living spaces. If you paint the bottles before you begin, you could have very colorful lighting or you could leave them clear – whichever way you prefer. Make a few burlap flowers to decorate them and then simply create the tiki torches which you can use on your outdoor table or affix them to poles and stick them all around your yard. Burn citronella oil in them to get a nice glow that also wards off pesky bugs.
DIY Instructions – Hometalk
Burlap Baker’s Apron
You can make this really great baker’s apron with no sewing whatsoever. You simply have to cut the burlap (you can use a burlap bag to get the writing that you want) and draw in armholes to cut out. Then just cut out the apron form and use a good fabric glue to attach the black seam. This will also keep the burlap from fraying and it looks great as a contrasting background. These would be perfect as gifts for anyone you know who loves to bake or make one for the special Dad in your life for Father’s Day – he can do all of his grilling in style.
DIY Instructions – Gailsdecorativetouch
Reupholstered Burlap Chair
Instead of throwing out that old chair that seems to be falling apart, why not reupholster it in burlap? If you don’t have an old chair to use for this project you can probably pick one up at a flea market or yard sale for really cheap. Reupholstering is much easier than you may think and when you are finished you will have a beautiful chair that looks great in any room. Add a burlap pillow and it will look even better.
DIY Instructions – Beneathmyheart
Burlap Flowered Lampshade
Take that old lamp that is in serious need of a makeover and create this beautiful flowered lampshade. You can use a new lampshade too if you want. Just create the flowers from burlap and then cut a thin strip for the top and bottom to bring it all together. You can glue the flowers and accents on with hot glue and even cover the entire lampshade if you prefer. This would be great done in different colors of burlap to really make the flowers stand out or you could just stick with a neutral color.
DIY Instructions – Laughterandgrace
Burlap Clothespin Bag
If you love drying clothes outside when the weather permits – not only do they smell wonderful but you can save a lot of energy this way – then you’ll definitely want to put together this burlap clothespin bag. It hangs right on the line so your pins are right there where you need them. You can use a burlap coffee bag that’s already put together or use fabric glue. After all, those clothespins really don’t weigh that much.
DIY Instructions – Apartmenttherapy 
Fringed Burlap Table Runner
Table runners are great for decorating and this fringed burlap runner will be a beautiful addition to your dining room table. You simply have to cut the burlap to fit the length that you need and then go through and fray the edges a bit, tying them off so that they don’t continue to fray in the future. This is a really simple project and tying the frays is actually the most time consuming part. You can easily finish this in a weekend and although there is a little sewing required, there’s not much so even if you are new to sewing, this is a great project for you.
DIY Instructions – Cottageandvine
Burlap Sunglasses Case
Keep those sunglasses safe and clean with a burlap sunglasses case that you can make yourself in just about an hour or so. This project requires a bit of sewing and you will want to choose a fabric to line the case so that your glasses don’t get scratched. You can choose whatever way you want to close the case but button closure on the front of this one works really well and is relatively easy to create. These would make great gifts so if you want something really unique for someone special, make them a burlap glasses case. They are sure to love it as much as you do.
DIY Instructions – Craftingagreenworld
Burlap Chevron Paintings
Chevron is a very popular design these days and if you want to add a bit of this design into your décor, these burlap paintings are a great way to do so. You just have to create the design on your burlap and then frame your finished result. These can be done in any color you want and they are so easy to do. Make them in whatever size you want, use whatever colors you want and you can even toggle the size of the design a bit, too.
DIY Instructions – Glueandglitter
DIY Burlap Canvas
Create a beautiful canvas for your home with burlap, a store bought canvas and whatever design or message you want to display. If you are redoing a specific room in burlap, these canvases are a must. You simply cut the burlap to cover a canvas (or several of them if you want something really large) and then paint on the message that you want to display. This is one of the easiest projects ever and it allows you to be completely creative. You could use stencils or just freehand your message to make it look really rustic and charming.
DIY Instructions – Happytogethercreates
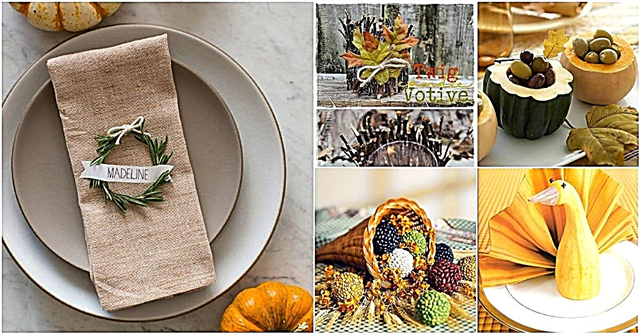
Thanksgiving Place Cards
Ok, so you don’t have to use these only for Thanksgiving but they will look great on your holiday dinner table. These burlap place cards are very easy to make and will take very little time so even if you are planning to have several guests for dinner, you can easily make a place card for each one of them. The center is made from chalkboard paint so they are easily reusable with other guests and you can embellish them with leaves or just anything else that you feel like using.
DIY Instructions – Thecountrychiccottage
Pottery Barn Inspired Burlap Candle
If you love Pottery Barn but just can’t bring yourself to pay some of the prices there, you are going to adore this Pottery Barn knockoff candle made from burlap. You can do these in any size you want. You just have to have a candle on hand that you will cover with burlap. Mod podge holds the burlap in place and once you have the burlap on, you just paint over it with gold paint which gives it that great Pottery Barn look without the cost.
DIY Instructions – Myloveofstyle
Burlap Prints
Printing on burlap is not nearly as difficult as it sounds and once you master that craft you can create these beautiful burlap prints that can be framed or hung on their own. You could make several of these and use them as gifts. Everyone loves burlap and who wouldn’t love their own framed print in burlap? You just choose the message that you want and then print it off directly on your burlap fabric. It’s really easy to do and it allows you to create wonderful prints and gifts that will take you literally only minutes to make.
DIY Instructions – Creativetryals
Burlap Jewelry Box
An old cigar box (a wooden one) and some burlap put together create this adorable jewelry box that will be great for keeping your rings and other jewelry perfectly organized. You will need to cut the burlap so that it just fits the width of the box and then cut it long enough so that you can roll it up and stuff inside the cigar box to hold your rings and other jewelry. If you know someone who loves unique gifts, this would be a great one. You can also paint the box if you want but it looks wonderful in its natural color.
DIY Instructions – Mrkate
Bathroom Subway Art
Subway art has become very popular and what could be better than printing that subway art onto burlap. This bathroom subway art is a beautiful way to decorate the powder room and you can colored stones that you can find at your local craft store to decorate it a bit. Just print the subway art off onto your burlap, frame it and then decorate around it. It’s really simple and something that will take you literally only minutes to put together.
DIY Instructions – Domestically-speaking
Burlap Dry Erase Calendar
Keeping the family organized can be difficult. Most people have a calendar of some sort to help them to keep things together and this burlap calendar is a great choice. You can draw the calendar however you need onto the burlap and then simply frame it in a glass frame. The glass is easily written on and then erased away if you use a dry erase marker. You can be very creative and choose frames of any color and even add a few embellishments if you want. This is a great project for organizing your home and using a bit of that spare burlap as well.
DIY Instructions – Simplykierste
Burlap Storage Bins
Who doesn’t love those handy storage bins? They are after all, perfect for keeping things neatly organized and when you make them from burlap, they are just as decorative as they are functional. You will want to have a few boxes on hand to cover but you can use old diaper boxes or anything that is the size that you need. After all, you will be covering them completely with burlap so it doesn’t really matter what they were in a previous life. Once you finish, you can use these to organize virtually every room in the house. They are easy to make and if you have burlap and boxes, they may not cost you anything, either.
DIY Instructions – Blissfulkeeperathome
Burlap Table Bouquet
If you are planning a burlap wedding, these little table bouquets will be perfect for decorating your reception. If you aren’t currently planning a wedding, you can still make these and just use them to decorate around the house. They are simply folded burlap with ribbon tied around to keep them in place and then filled with lovely flowers. You can use whatever flowers you want or decorate them a bit of you want. You can literally make these in about ten minutes each so if you are planning a wedding, this is a really quick way to get those tables decorated.
DIY Instructions – Propcloset
Burlap Wine Bags
If you love giving wine as gifts, try making these great burlap wine bags to hold that wine. Each bag takes only about half an hour and you can decorate them however you want. Use stencils to put messages on the fronts or even add burlap flowers or bows. These are very easy to make and take very little material so a yard or two of burlap will make several of them. Just tie the top up with ribbon or use twine to really make the bag look rustic.
DIY Instructions – Michaels
Recycled Patron Vase in Burlap
Patron bottle vases are elegant and adorable and you can really dress them up with a little burlap. Just cover the vase in lace and then cover the center of the lace with burlap or you could do this vice-versa and put the burlap as the backing. These are great for decorating for parties because they are inexpensive and very easy to make so if you need several, they won’t take days to make or cost you a fortune. Add a flower to each one and you’re all set.
DIY Instructions – Diyinspired
Burlap Wedding Invitations
If you are planning a wedding that uses a lot of burlap, why not incorporate the look into your invitations? With some card stock, a printer and a little burlap you can create beautiful invitations that are sure to be a huge hit with family and friends. These are also great for summer parties and other special occasions when you need to send out invitations. You could also use them as wedding programs to let everyone know who is in the wedding and the venue that you will be following.
DIY Instructions – Intimateweddings
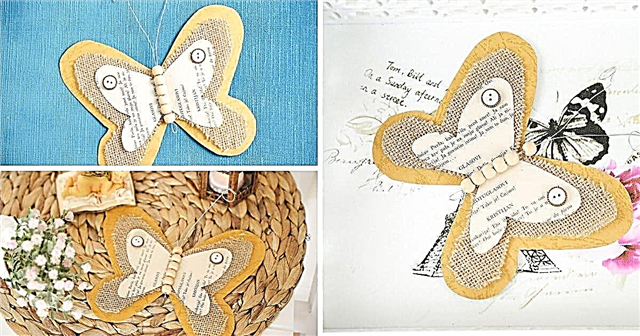
Burlap Boutonniere
Whether you are planning a burlap wedding or you have a special someone going to the prom, these burlap boutonnieres are a great choice. You can cut the form out of an empty cereal box so if you already have the burlap and a few other supplies on hand, you won’t have to spend anything to make these. You could add baby’s breath or other flowers to them and actually customize them to perfectly match any wedding theme. And, they’re a lot cheaper than boutonnieres that you purchase from the florist.
DIY Instructions – Greenweddingshoes
Burlap Door Hanger
Whether your family is filled with football fans, baseball enthusiasts or any other sport, you can create a wonderful door hanger that suits your family perfectly. This burlap door hanger is really easy to create and can be completely customized to fit your family’s favorite sport and favorite team. You just have to cut the burlap to match the form that you need (football, baseball, etc.) and then sew it together and stuff. Once you’re done you can decorate with bows or just anything that makes it special.
DIY Instructions – Greatdaygraphics
Burlap Covered Gifts in a Jar
You know how popular gifts in a jar are. Well, this is a burlap twist on those popular gifts. When decorating your jars, add burlap to the top and then some twine or jute rope for tying. You can use smaller jars and give them away as party gifts or create larger ones and use as gifts for special occasions. The burlap really gives the jars a homey look and you can fill them with your favorite recipes or even jellies, jams or any other yummy goodness.
DIY Instructions – Tinyprints 
Burlap and Mason Jar Storage
Old mason jars and some burlap work really well together in creating this wonderful storage shelf that you can use in bathrooms, kitchens or anywhere you need it. You simply cover a piece of wood with burlap and then affix your jars, which will need to be secured with clamps. These are great for holding Q-tips and cotton balls in the bathroom or you could use them in the kitchen for housing your wooden spoons. The entire project takes less than an hour and gives you a beautiful storage solution.
DIY Instructions – Putitinajar
Burlap Owl Wall Hanging
The kids are going to love helping you to create this whimsical owl from burlap. You need burlap, felt and a few craft supplies and then you can hang your little owl on his own tree branch. Frame it and you have a beautiful wall hanging that is sure to bring a smile to everyone who sees it. This project does not require any sewing. You can glue everything together with a hot glue gun and it’s so easy that you may end up adding more than one owl to your little tree.
DIY Instructions – Urbanhoot
Burlap Picture Matting
If you really want your pictures to stand out when you hang them, replace the matting behind them with burlap. This is a great way to make your entire photo display look rustic. You can purchase frames at the Dollar Store for around a dollar each and then make them really special by adding the burlap and some scrapbooking paper to create a unique mat for each picture. You don’t have to sew or even glue for this one. Just add the burlap and then the picture and the glass from the frame will keep it all in place.
DIY Instructions – Twostorycottage
DIY Burlap Advent Calendar
You can create a beautiful Advent calendar using burlap or you could turn this into a Christmas countdown calendar if you wanted. Actually, you could use it as a normal calendar if you want, just be sure to add a label for each month. If you are making and Advent calendar, you can fill the numbered pockets with small candies or gifts or use plain labels instead of pocketed ones to create a regular calendar. Either way, this is a really easy project and one that won’t cost much, either.
DIY Instructions – Onsuttonplace
Burlap Christmas Trees
These beautiful burlap Christmas trees are inspired by Pottery Barn but they cost much less. You can do these in alternating colors or alternate the burlap with canvas to make them a bit unique. You can make them as tall or short as you want, depending on the size of the cones that you use and you can make them fuller by simply adding more fabric. Once you’re finished, decorate if you want or just leave them plain. There is no sewing required so this is a project that everyone can do and the kids will love to help with it.
DIY Instructions – Myhappynest
Burlap Boot Stuffers
Ok, so this is not technically a décor project but it’s a very helpful one anyway. These burlap boot stuffers are great because they are quick and really inexpensive to create and they work perfectly for keeping your boots from drooping. Two boot stuffers takes only a yard of burlap to create so you can make several of these if you have more than one pair of boots. These are also great for gifts and there is very little sewing required.
DIY Instructions – Shinewithjl